Saturday, May 24, 2014

Serving Tray's...Not Just For Serving

At least 3 days out of each week I run into Goodwill just to see if there is anything I must have.  Mark loves that my favorite place to shop is Goodwill, it's great for our budget.  :)  There is one thing that I have such a hard time walking away from and they always have them...Serving Trays!  Most of the time they are brown wood that has a few scratches, not a problem for me because I'm going to paint them anyway!  Gosh I love them.  I use them everywhere in my house and the best part is they are usually only $.99 or $1.99! 

Here is one that I keep on my Kitchen counter.  I think it just makes everything look a little more clean and put together.  Yes, I know I have a crazy amount of Kitchen gadgets...I like them too.  ;)  This one was just a brown wood piece when I purchased it and of course I didn't take any before pictures...ugh.  Just a little white spray paint and it looks as good as new!  Please ignore the beautiful gold countertops (sigh) a Kitchen makeover will be here by the end of Summer.  I just have to have patience until then. 


This one I keep on my desk in the Office I mean Parlor.  ;)  It was a gold color before but I thought that white went really well with the gray top of my desk.  Just a little something to hold paperwork and such. 


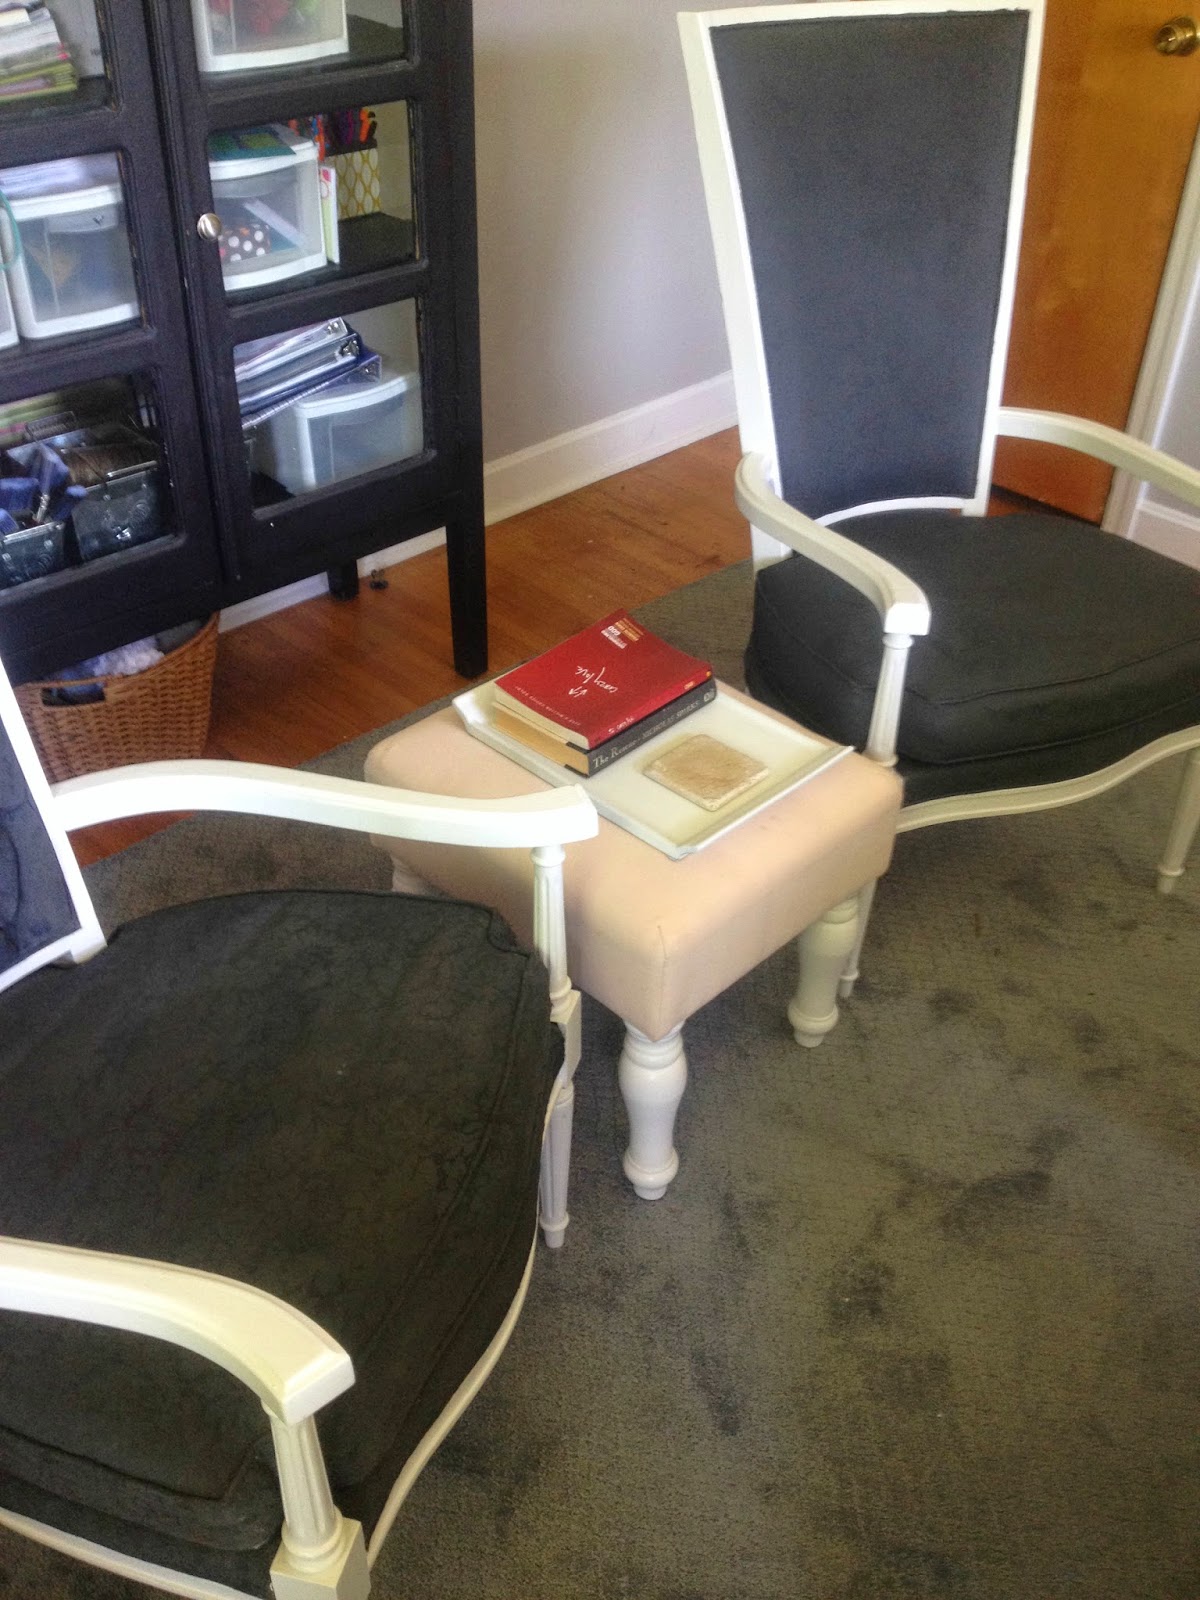
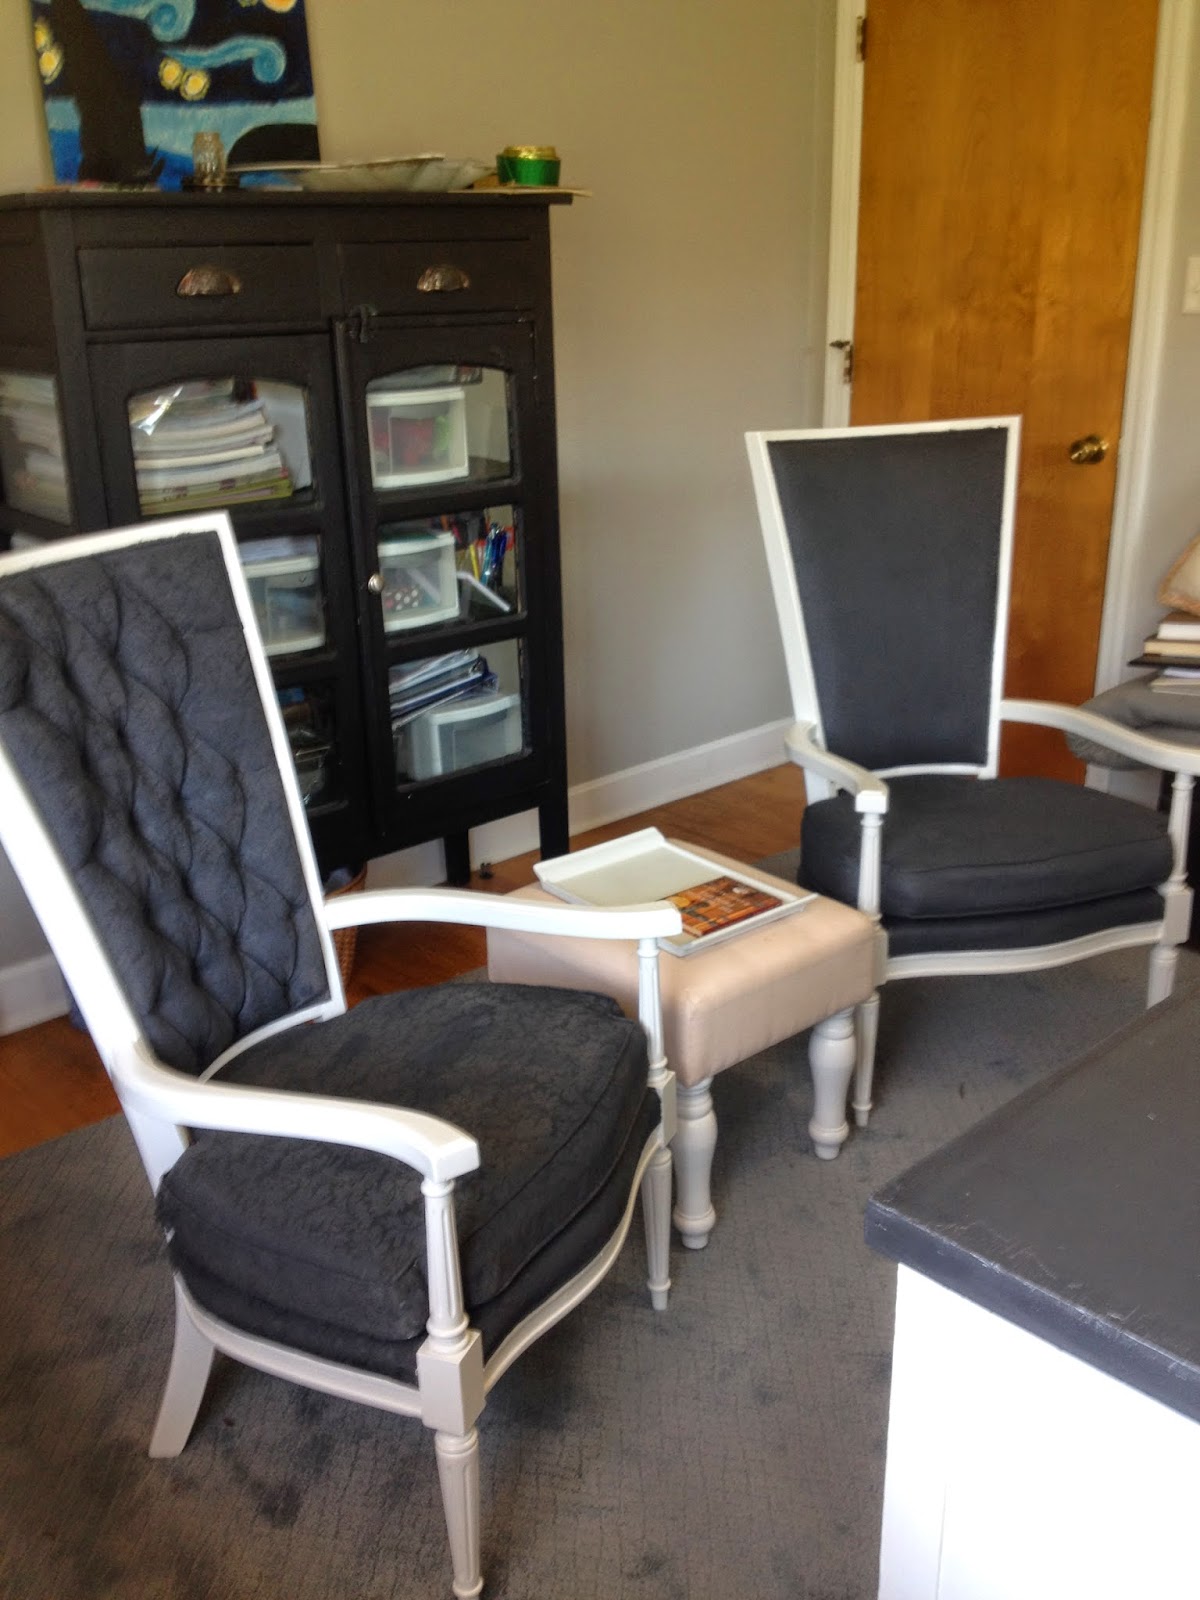
This beauty is actually metal that of course I painted.  It is also in the Parlor, it sits on top of a small little ottoman (that was also a Goodwill find for $7 brand new with tags from Target) in between the painted chairs


So the next time you are browsing your local Goodwill or Thrift Shop and you see a ugly serving tray, pick it up!  There are a million different ways to use them. 

Have a good idea for using a serving tray?  Please share, I would love to find a way justify buying more!  ;) 

Saturday, May 17, 2014

Cheap Kitchen Decorations...Thank You Goodwill!


Very soon we will be working on updating our kitchen.  I could not be anymore ready to paint my kitchen cabinets and get a new oven.  Seriously, my kitchen deserves a little love.  It gets used for dinners daily and I cant wait for the day that I don't have to stay on guard while baking something in the oven.  My oven is 50 years old.  For real, 50 years old!  Isn't that crazy?  (I know this because we purchased our house from our neighbors whose parents built our house.  They said yes, original oven).  It still works...kinda.  I mean you have to flip bread every 2 minutes or it will burn and I am very limited to what I can make in it.  In the 8 months we have been here I have learned what it works for and what it doesn't.  So yea, I deserve a kitchen update.  ;) 

Anyway, I started pondering what I would like to hang up in the kitchen after we do our remodel and I remembered a cute little Spoon & Fork I bought from Goodwill about a year ago before the move.  They were only $1.99 each and I thought they were cute so I picked them up.  Mark loved them until he found out I would be painting them.  ;)  So I went through my junk room which is really a room of projects waiting to happen.  It's my favorite room in the house.  ;)


I decided to paint them with the same blue that I used in the the painting I repainted a few weeks ago.  I didn't prime them or seal them because they will just be up on the wall.  Just 2 coats of paint and they were done! 


I like them!  Not to bad for less than $5!  Do you have any decorations that you have picked up at Goodwill and painted to update?  


Friday, May 9, 2014

Pegboard For Baby Boy Nelson

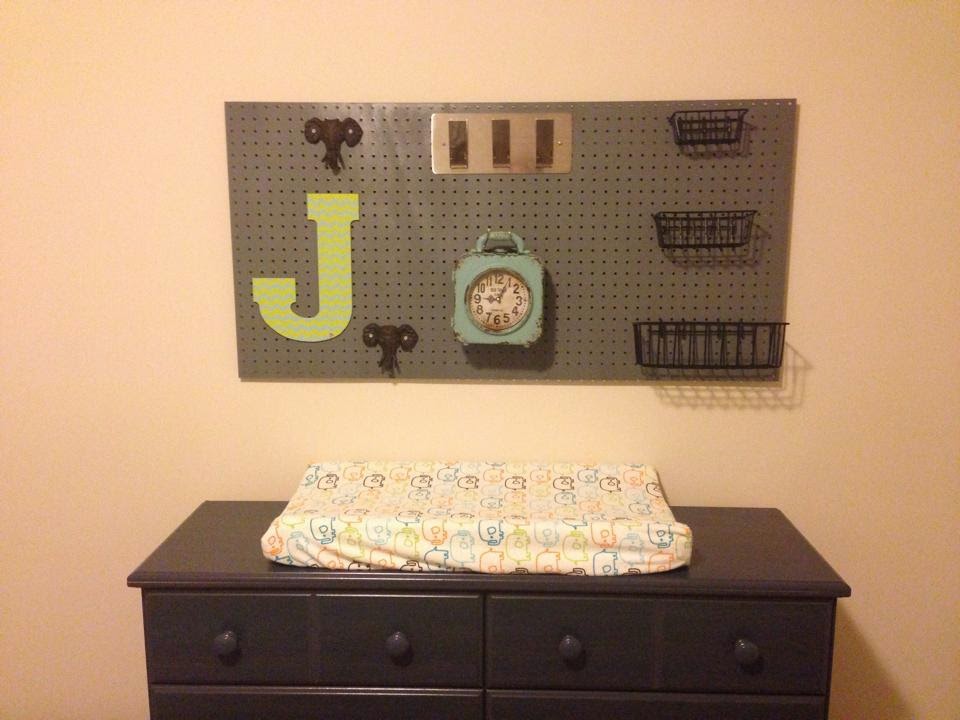
Let me start off with this, I'm so stealing this idea from my sister (Ashley) when me and Mark have a baby one day!  She did this in Baby Boy Nelson's room and I thought it was so creative and cute that I had to share!  It was a super easy project that didn't take much time at all!  Easy!

She purchased a plain pegboard and one night we spray painted it gray.  After it dried she just nailed on all of these cute little things!  How easy and precious is that?!  She is planning on using the baskets to hold diapers and wipes because this is conveniently located right above the dresser/changing table.  There are also clips on the top that could hold pictures as well.  Seriously it doesn't get any easier than this project! 

I think this is a cute addition to a baby's room but could also work in an office or craft room too!


What creative uses do you have for pegboard?  I would love to hear your ideas!

Saturday, May 3, 2014

The Painting That Needed Repainting


OK, confession time.  We have been living in our new house (new to us, built in 1967) since September and there is not one thing hanging on my walls.  It's shameful, right?  Here's the issue, before we moved in we worked so hard "fixing" and painting the walls that it hurts my heart to put a nail up!  I mean, what if I change my mind, there will be a NAIL HOLE in my perfect wall!  Little fact about me...I have a hard time committing!  I mean picking out a paint color is the most stressful thing in the world for me.  The funny part is this time I knew what paint color I wanted, (thanks to my best friends new house) I had seen it on a large scale and already loved it.  You would think that would take the stress out of it for me...but it didn't.  Why you ask?  I came home ready to paint and Mark had gotten there a few hours before me and had already started painting.  I walked in and he already had the 1st coat on the den, I panicked.  I was all like this isn't right, this isn't the color, it looks to light!!!  Mark knows me...I mean really knows me.  So he says, "It's OK!  Let me get a 2nd coat in this room and if you don't like it we will go back and get something different."  He knew that if I gave it a day or two I would love it, change just isn't my strong point.  He was right, I did love it...so much that I have not been able to hang one single thing up on the wall.  :)

Which brings me to these canvas paintings I picked up at Goodwill.  I knew when I purchased them that I didn't like the color at all but I thought I could spray paint the whole thing white and it may look good.  They are very textured so even if I painted the entire thing you could still see the branches design in them.

Before


Last weekend I decided to pull them out and give it a try.  I decided I would paint them a light blue color (with free paint I scored from Home Depot!).  I thought the blue would look nice against the gray walls in "The Parlor" (which is really my office/craft room - Mark just insist we call it The Parlor).  :)

With 1 coat of blue


Originally I thought I would just paint them all blue and be done.  But as I was painting I kept thinking that the branches would look really nice white.  I kept just trying to dismiss the thought because I really wanted to hang something up that day!  But as soon as Mark walked through the door whats the first thing he said?  "Wow, that looks really good!  You should paint the branches white!"  That decided it, if my husband says out loud what I was thinking then its a done deal.  The branches needed to be white.  So I painted the branches white with a paint brush, didn't even worry about getting it on the blue at all.  

With white branches


All that was left was going back over the entire painting with a foam roller and painting over everything with blue one more time.  I thought that the foam roller would keep the paint from getting in the white branches but I was wrong.  I ended up having to go back with a small artist brush and touch up the white anyway.  

Finished Canvas


I'm really pleased with how they turned out!  Not bad for a $12!  The only thing I had to purchase was the actual canvas', I already had the (free) paint!  I will always look at Goodwill for any textured canvas paintings because now I know they can be painted over beautifully!  And finally, I have at least two things on my wall.  ;)  

What about you?  Have you ever purchased a thrift store/Goodwill canvas knowing you were going to paint over it?  Any DIY wall decoration ideas?  I would love to hear your ideas and see your pictures as well!  

Happy Painting!  


Saturday, April 26, 2014

Make Packing Lunch Easy! No Pantry - No Problem!


Y'all, sometimes the simplest things make life SO much easier!  This is hardly a DIY project.  It's more like something that I did years ago just to make life a little more organized and easy.  About 7 years ago I was trying to loose weight I started taking my lunch and snacks everyday to work.  I would go grocery shopping on Sunday and plan out my lunches, snacks and dinners for the whole week.  I would put all of my snacks in little baggies to make sure my portion sizes were correct.  That's how I came up with this idea.  I found it was a lot easier to have everything displayed and easily seen then stuffed into a basket. 

Fast forward to now and I have an amazing husband that I get to pack lunch for everyday!  I don't have a pantry at our house but our laundry room is attached to the kitchen and this is what I use to keep all of his snack stuff for his lunches!

Snack Solution


I go grocery shopping and come home and take about an hour to go through and put everything into little snack size baggies when I get home.  Then each night when I pack his lunch I can do it in record time!  It's a great way to save time! 


All I did was pick up a Shoe Organizer (you can get this at Target or Walmart; maybe even the Dollar Tree) and lots of sandwich baggies.  Then just take the time to put all of your chips and cookies into the baggies and you have a great snack system!  Just make sure when you get your organizer that it has see through pockets so that you can see your snacks! 


Anything that doesnt fit into my snack organizer I just keep in a little basket! 
 
What about you?  What are some organizing timesavers that you have?  I would love to hear your ideas!  


Saturday, April 12, 2014

The Painted Chairs (Painting Over Fabric)

Y'all, I seriously couldn't be any more excited than I am right now.  I have finally finished my new (old) chairs.  Let's start off with this, I found these at Goodwill 2 years ago.  Yes... 2 years ago!  They were UGLY and only $10 each.  I really loved the look of the chairs and thought I would give reupholstering a try.  Once I got them home I knew that I had bitten off more than I could chew.  There was NO way me and my beginner self would be able to reupholster these.  So I did what anyone would do, I threw a blanket over them and ignored them for 2 years...lol.  Every time I looked at them they were screaming out to me...MAKE ME PRETTY, I HAVE SUCH POTENTIAL!  Once we moved into our new house and I had a Parlor (really it's an Office/Craft room but Mark insist that we call it the Parlor) I knew they would be perfect for a sitting area in front of my Desk.  I decided that because I didn't think I could reupholster them that I would paint the fabric just like I did on my Painted Couch

Chairs Before


So, here's what I did.  :)  I used an old Tupperware bowl and mixed 2 cups of paint (just flat latex), 2 cups of Textile Medium (got from Hobby Lobby with my coupon) and 2 cups of water.  Make sure you spray the material with water before you start painting so the paint doesn't soak into the material as much.  Then I just used my favorite paint brush and went to town painting.  I didn't really worry about getting paint on the wood because I knew I would be painting the wood anyway. 

This is after 1 coat of paint


It only took 2 coats of paint!  I made sure to keep some paint for mess ups that would happen when I painted the wood and I'm glad I did!  Next step was to prime the wood.  I used 2 coats of Zinsser Primer Bulls Eye 123 which is my favorite primer ever.  Once I had the primer on I knew that the final product would be amazing.  The dark gray painted material looked so great even against the white primer!

2 coats of primer


I used Valspar Latex Enamel (interior/exterior) Paint.  I had used that on the Bookshelves as well as the Desk and loved the finish it gave me.  I did 2 coats and it was perfect!  Last step was just to do a coat of Minwax Polycrylic to seal it. 

I love the final product!


I love the process of painting fabric and it's so easy anyone can do it.  These chairs are a little firm right now, the feel of them is something very close to leather.  Plenty comfy enough to sit in!  When I painted the couch it had the same feel (leather like) for around 2 months and then it felt just like any other normal non painted fabric.  I love them and I know from my experience with the couch that they will hold up great! 

I also wanted to share a beautiful chair from 11 Magnolia Lane!  This beauty was the inspiration behind my gray and white color scheme.  So beautiful!  It is also a painted fabric chair with another great tutorial.  Hop on over and show 11 Magnolia Lane some love!


What do you think?  Would you ever consider painting fabric?  I would love to hear your thoughts on the before and after of the chairs!  Happy Painting! 


Friday, April 4, 2014

The Painted (ugly) Lamps

Let me start by saying I'M SORRY for the horrible before picture.  I thought I had others but apparently, this was the only one.  When we first moved into our home we were pretty much starting from scratch as far as accessories go.  So whenever someone offered us something my only reply was yes, please and thank you!  Who am I kidding, that's still my reply when someone offers us something.  LOL.  You never know how you can transform a piece no matter how ugly it may seem.  Case and point, these lamps.  They were not my style at all but I knew we needed lamps!  So I rolled with it!

Lamps Before


After a few weeks of walking in and seeing them I knew that I had to do something to change them up.  I thought about the new spray paints Mark had bought for me and went to see what fun colors I had.  I could pretty much pick any color that I wanted because as you can tell, I didn't have any theme yet that I needed to stick with.

I decided to go with Krylon Jade.  I took the lamps outside and gave them a little wipe down and started spraying!  It took 2 coats of the Krylon Jade.  I didn't use any primer because this isn't something that will get a lot of wear and tear.  Just a pretty for my nightstand.  :)

Lamps After


It's amazing how a little bit of spray paint can change something so quickly!  I have also added a cute little throw to the bed to give the room another nice little pop of Jade. 
 
What about you?  Are you looking around for something to spray paint now?  :)  Spray paint is my go to if I need a quick change! 


Do you like the new color of the lamps?!